Welcome, fellow food enthusiasts! Are you ready to unlock the secrets of elevating your dishes with some foundational cooking techniques? Today, we’re exploring the art of transforming simple ingredients into culinary gold. From sautéing mushrooms and onions to mastering a roux, and balancing flavors with a Hungarian twist, we’ve got a treasure trove of tips to share. So grab your apron, because we’re about to make your kitchen adventures even more exciting.
Sautéing Mushrooms and Onions
((TEXT START))
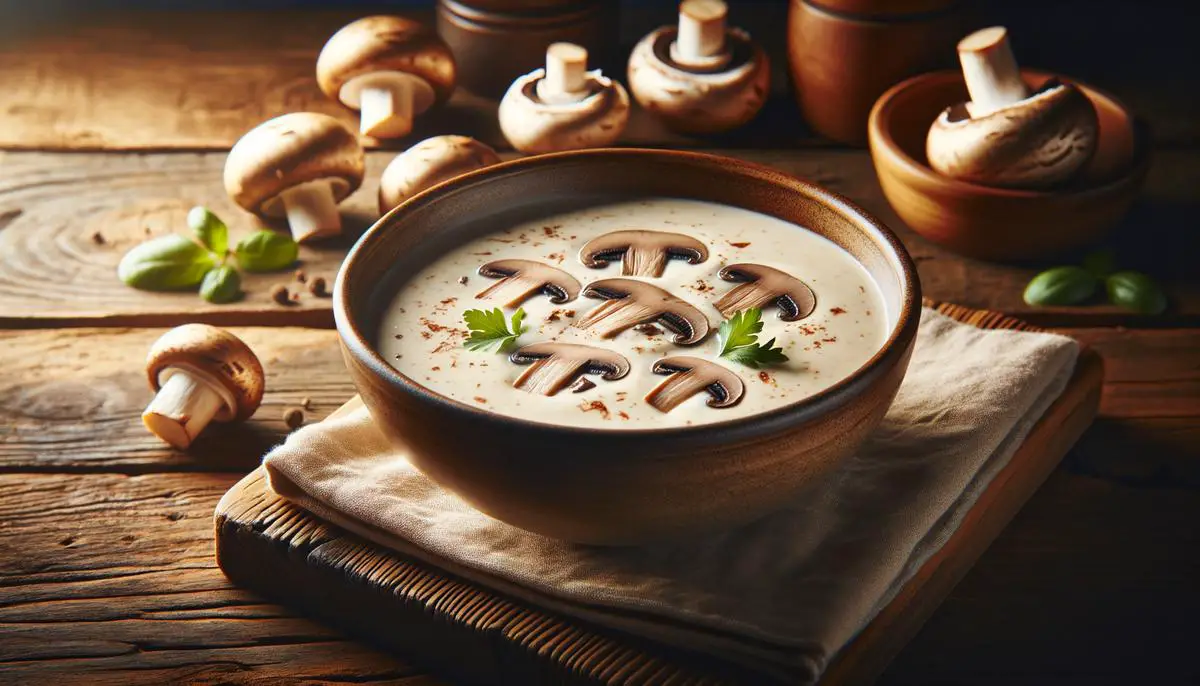
Perfectly Sautéed Mushrooms and Onions for That Ultimate Flavor Base!
Hey, flavor seekers! Ever wonder how to get that mouth-watering, umami-packed base for your dishes? It all starts with perfectly sautéed mushrooms and onions. Whether it’s the beginning of a hearty stew or the secret behind those irresistible sandwich toppings, getting this duo right can elevate your cooking game. Don’t worry, though; it’s easier than pie, and I’m here to walk you through it step-by-step.
Grab your skillet, and let’s turn those simple ingredients into something magical.
Needed Supplies
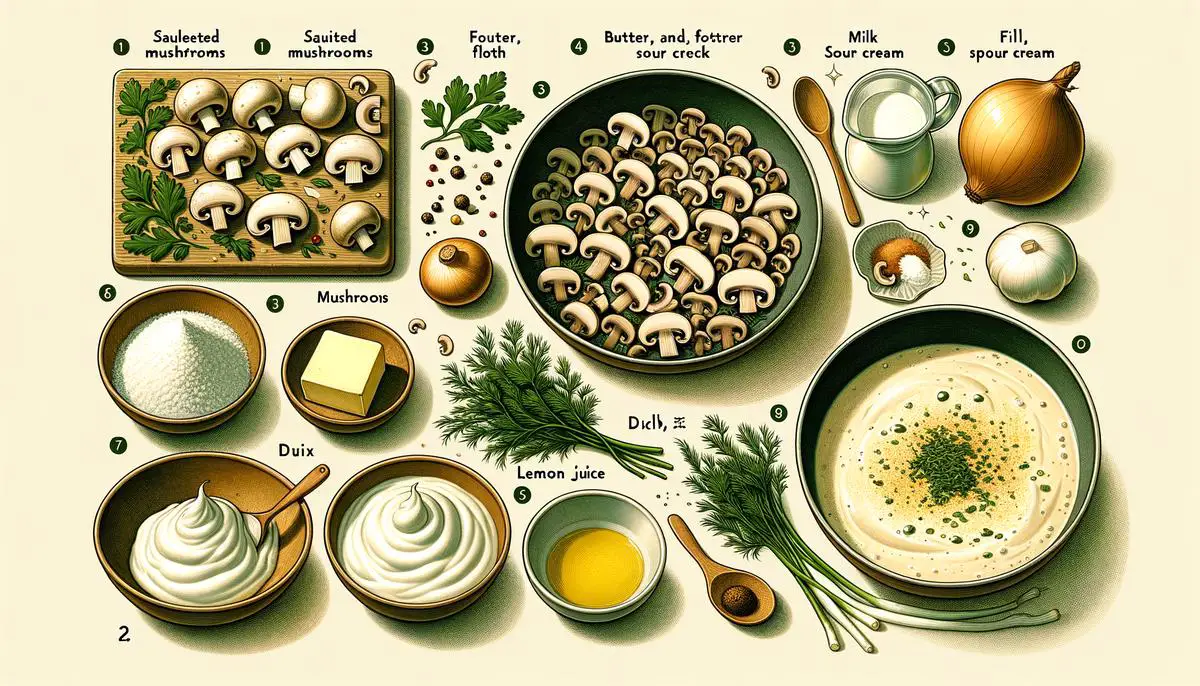
- A large skillet (non-stick or cast iron works great!)
- A spatula
- About 1 lb (450g) of mushrooms (any variety you love)
- 1 large onion
- Olive oil or butter (or a combo! Why choose?)
- Salt to taste
- Freshly ground black pepper
Mushrooms and Onions Magic Show
- Prep Time: Start by thinly slicing the onion. For the mushrooms, wipe them clean with a damp cloth and slice them as well. Pro tip: Keeping the slices relatively the same size helps them cook evenly.
- Heat it Up: Place your skillet over a medium-high heat and let it get nice and hot. This part is crucial for getting that perfect sauté rather than a steamy, soggy mess.
- Fat Time: Add a generous swirl of olive oil or a sizeable dollop of butter to the pan (heck, mix both if you’re feeling adventurous). Wait until the oil shimmers or the butter is bubbling with joy.
- Onion’s Turn: Toss the onions into the pan with a pinch of salt. The salt not only flavors the onions but also helps draw out moisture, making them soft and golden. Stir occasionally, and let them get to that perfect stage of translucent softness with just a hint of browning at the edges.
- Mushroom Magic: Now, in go the mushrooms. Spread them out. If it looks crowded, don’t shy away from cooking in batches. Crowding = steaming, and we’re in the sauté business, remember?
- Stir, Season, Savor: Keep stirring occasionally. As the mushrooms lose their moisture, they’ll start to brown, and oh, that smell! Magnificent! This is the moment to sprinkle some salt and crack some fresh pepper over them.
- Patience is Key: The onions and mushrooms will begin to caramelize, mingling together into a deliciously fragrant concoction. This could take around 10-15 minutes, depending on how high your heat is and how much moisture your mushrooms held. Patience pays off here – those browned bits at the bottom of the pan? Pure gold.
- Tasting Time: Give it a taste; adjust the seasoning if required. Remember, cooking is all about making it your own.
- Serve and Wow!: You’ve done it! That’s your golden ticket to flavor town. Top off those burgers, stir into gravies, or simply enjoy it as a side dish.
With these simple steps, you’ve transformed humble mushrooms and onions into a versatile, deeply flavorful masterpiece. It’s not just cooking; it’s a little bit of magic in your kitchen. Enjoy creating your sensational dishes with this ultimate flavor base!
((TEXT END))
Creating a Roux
((TEXT START))
Continuing on our journey to mastering the art of soup-making, the heart and soul of a flawless, thick pod of comfort lies in mastering one key step: making a roux. If you’ve ever found yourself at the crossroads of a runny disaster and a dream soup, stick around! The magic of transforming your soup from a watery spell into a lush, velvety cauldron is all in the roux. Here’s how to cast that spell the right way.
What’s the Secret to a Perfect Roux?
First things first, let’s clear the air about what a roux actually is. Simply put, it’s a mixture of fat (yes, the one we lovingly stirred our onions and mushrooms in) and flour. It acts as a wizard in your culinary playbook, thickening anything it touches. But the real secret isn’t just in the ingredients; it’s in the love, attention, and patience you put into it. Here’s how to do it:
- Measure with Your Heart but Don’t Forget Your Head
For every cup of soup you wish to thicken, start with equal parts of fat (the leftover olive oil or butter you’ve already shown some love in the skillet) and flour. A good rule of thumb is about 2 tablespoons of each for starters. - Whisk Your Heart Out
Slowly sprinkle the flour over your simmering fat. Grab that whisk and stir like you’re conducting an orchestra. This is where the serenade begins – low and slow my friends. You’re aiming for a smooth, clump-free mixture. - Color Tells the Story
Patience, my dear Watson. Keep that mixture moving over a gentle heat. You’re looking for a subtle change in color – from the blonde innocence to the golden depth of age. This usually takes about 3 to 5 minutes. Remember, the darker the roux, the richer the flavor, but careful not to let it burn. Blackened roux is the end of any good soup fairytale. - Liquid Love
With your roux golden and ready, slowly start introducing your soup base into the mix. Pour slowly, whisking fervently as if you’re casting out any lumps or shadows that dare spoil the creaminess. Allow the mix to embrace each other, introducing more liquid as they meld into one. - Patience Prevails
Now comes the true test of any cook – patience. Continue simmering, and you’ll notice the alchemy at work as your soup starts to thicken, hug each of the coat spoons, and smile in bowls. - Final Flourish
Trust your senses. Look, stir, taste. If the thickening isn’t quite there yet, don’t fear a little more flour, carefully buoyed in by a butter liaison, whisper it into the pot and watch as the roux works its final magic.
And there you have it! The secret to making a roux that will give your soup not just the perfect thickness, but the soulful warmth of a well-kept secret shared between friends. Pair with a hearty laugh, maybe a tear of joy, serve generously, and watch as each spoonful thickens not just your soup, but the bonds between those who share it. Happy cooking!
((TEXT END))
Balancing Flavors
((TEXT START))
Alright, let’s get into the magical world of Hungarian flavor balancing! Crafting that authentic Hungarian tang is like conducting an orchestra where every ingredient plays its part perfectly. So, buckle up! We’re about to make our taste buds sing with joy.
First up, let’s chat about paprika because, honestly, what’s a Hungarian dish without it? It’s the soul of Hungarian cuisine. You’ll want to experiment with both sweet and smoked varieties. The trick? Add the paprika off the heat to prevent it from turning bitter. It’s like giving it a warm hug rather than throwing it directly into the fire. Let it blossom in the residual heat and watch as it infuses your dish with that quintessential deep, smoky essence.
Now, onto sour cream, the creamy counterpart to our punchy paprika. Dollop it in stews or swirl it into soups for that rich, tangy kick that balances out the smokiness. The cool, refreshing tang of sour cream is your secret ingredient to harmonize the flavors. The beauty of sour cream is its ability to meld flavors together, much like a skilled painter blending colors on a canvas.
Next, we can’t forget vinegars and wines! A dash of vinegar or a glug of white wine in your dish can lift and balance the richness, adding a delightful brightness that prevents flavors from feeling too heavy or one-dimensional. It’s like sprinkling a little bit of sunshine into your cooking, turning an already beautiful landscape into a dazzlingly vibrant masterpiece.
Now, let’s bring in caraway seeds – the unsung heroes. Toast them gently to release their nutty, anise-like flavors. They’re like the background singers that you don’t always notice but definitely miss when they’re not there. Sprinkle them into your dishes for an earthy warmth and complexity that ties everything together.
Lastly, don’t be shy with onions and garlic. They’re the foundation, the bedrock upon which Hungarian cooking is built. They should be sautéed to golden perfection, becoming sumptuously sweet and aromatic. It sets the stage for every other ingredient to shine brightly, highlighting their individual qualities while contributing to the overall symphony of flavors.
And there you have it, secrets to mastering that authentic Hungarian tang. It’s all about balancing the robust with the subtle, the tangy with the smoky, and letting each ingredient sing its part in harmony. So, go ahead, give it a try, and immerse yourself in the beautiful complexity of Hungarian flavors. Who knows? You might just create a masterpiece worthy of a standing ovation from your taste buds. Enjoy your culinary adventure!
((TEXT END))
And there you have it—a guide packed with culinary wisdom that’s sure to make your next meal an unforgettable experience. Whether it’s the rich depth of sautéed mushrooms and onions, the velvety magic of a well-made roux, or the harmonious balance of authentic Hungarian flavors, these techniques are your keys to unlocking incredible tastes and aromas. Remember, great cooking isn’t just about following recipes; it’s about embracing creativity and making each dish uniquely yours. So go ahead—experiment, taste, and let your culinary spirit soar!