When it comes to the art of cooking and preparing meals, the simplicity and quality of ingredients play a pivotal role. This article aims to guide you through the process of achieving perfection in the seemingly straightforward tasks of making sushi rice for onigiri, creating the best tuna mayonnaise mix, and mastering the shaping of onigiri. Each section builds on the last, offering insights and tips that elevate these basic components to a level where they significantly enhance the final dish. Let’s explore these culinary tasks with precision and care, aiming for nothing less than perfection.
Rice Cooking
Achieving the Perfect Sushi Rice Texture for Onigiri
Onigiri, the comforting Japanese rice ball, hinges on one critical element: the texture of its sushi rice. Unlike the indiscriminate rice scenarios you might find yourself in, onigiri demands rice that’s sticky enough to hold together yet retains individual grain integrity. Here’s how to nail it every time.
Rice Selection is Key: Start with the right type of rice. You’re hunting for Japanese short-grain rice. Its inherent stickiness is onigiri’s best friend. Avoid long-grain varieties like the plague; they’re too sleek, too aloof, lacking the communal spirit of short-grain rice.
Rinsing Ritual: Measure out 2 cups of rice. Submerge in cold water, gently swirled with fingers. The water becomes a milky fugitive, escaping with the rice’s excess starch. Drain. This rinsing ritual, repeated 3-4 times, until the water is notably clearer, prepares the rice for its stickiness potential without turning into a gloppy mass.
Water Wisdom: The water-to-rice ratio is a sacred geometry, 2.5 cups of water to 2 cups of rice. It’s a covenant not to be broken. Less water, and you’re in dry territory; too much, and you’re swimming back to the shore.
The Simmer Sequence: Combine rice and water in a saucepan. Uncovered, bring to a boil. It bubbles, it protests, it tries to escape. Then, reduce to the lowest simmer, and cover. This is where patience plays its part. Let it cook for 20 minutes. No peeping. The steam is an integral part of this closed society.
The Resting Period: Off the heat, it rests under its lid. This 10-minute meditation allows the rice to absorb any remaining whispers of moisture and contemplate its sticky future.
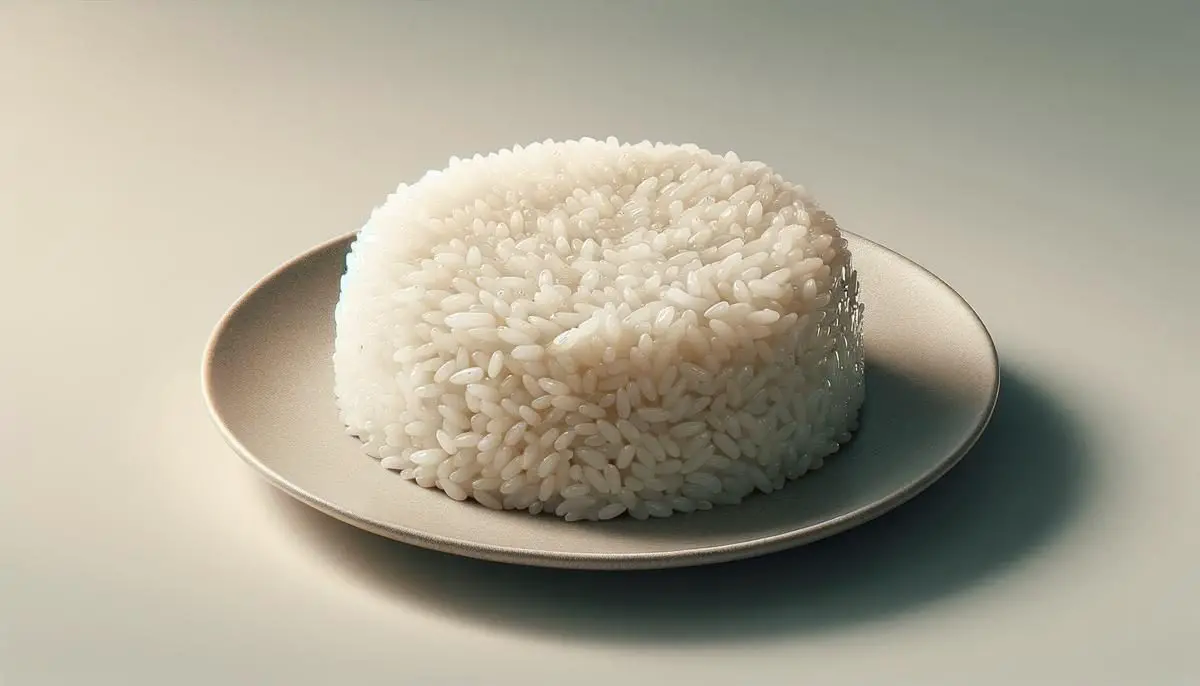
Seasoning Scene: While rice dreams, prepare sushi vinegar (combine 3 tbsp rice vinegar, 2 tbsp sugar, 1 tsp salt, heat until dissolved). Once the rice awakens and fluffs with a fork, sprinkle the sushi vinegar over it. Fold gently. The rice is now glossy, seasoned, and primed for onigiri.
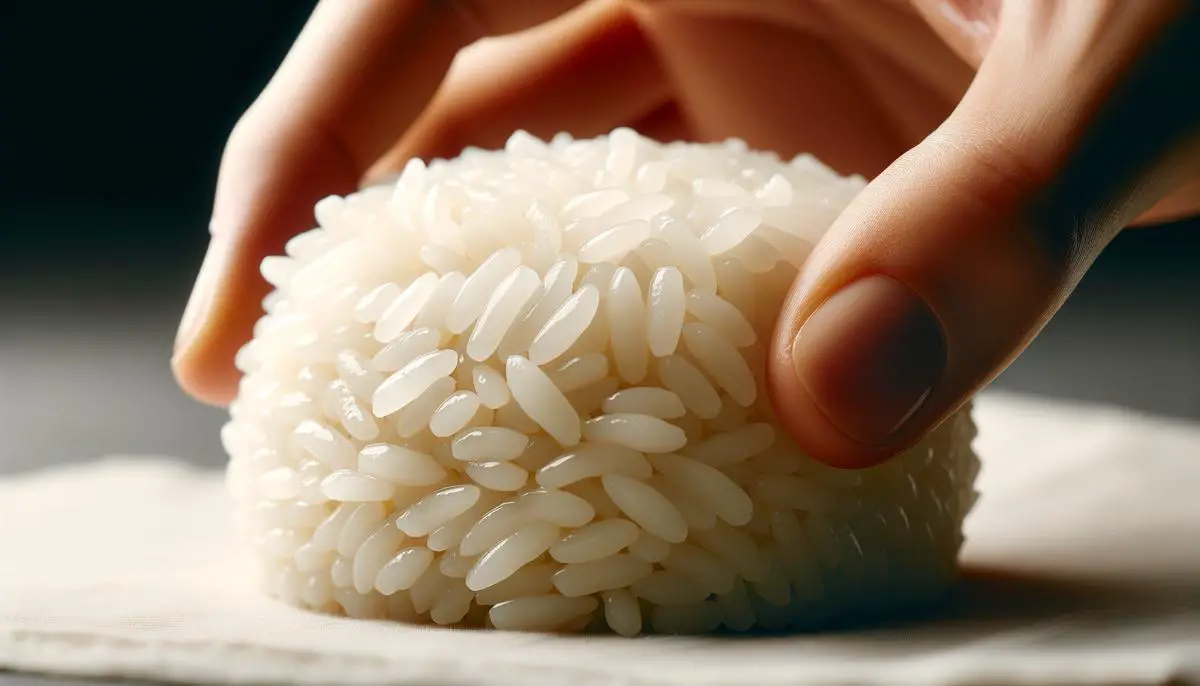
Assembly Arts: Wet your hands (prevents sticking) and grab a handful of rice. Compress into your desired shape. Traditionalists go for the triangle; rebels might eye a ball. Insert a filling if you wish—pickled plum, salted salmon, or nothing. Compact enough to hold firm, gentle enough to respect each grain’s autonomy.
Final Touch: Optional but recommended, wrap a strip of nori (seaweed) around it for a crunch and a handshake of flavors.
And there it is. Your onigiri, a testament to the sublime art of achieving the perfect sushi rice texture – sticky, yet respectful of each grain’s personal space.
Tuna Mayonnaise Preparation
Creating the Perfect Tuna Mayonnaise Mix: A Deliciously Simple Guide
Stepping into the realm of simple yet profoundly satisfying sandwiches, the tuna mayonnaise mix holds its ground as a classic. The secret to crafting the most flavorful blend doesn’t lie in extravagant ingredients or laborious techniques but in the artful combination of simplicity, quality, and a dash of culinary intuition. Here’s how to elevate this humble mix to a gourmet level.
Selecting the Tuna: The Foundation
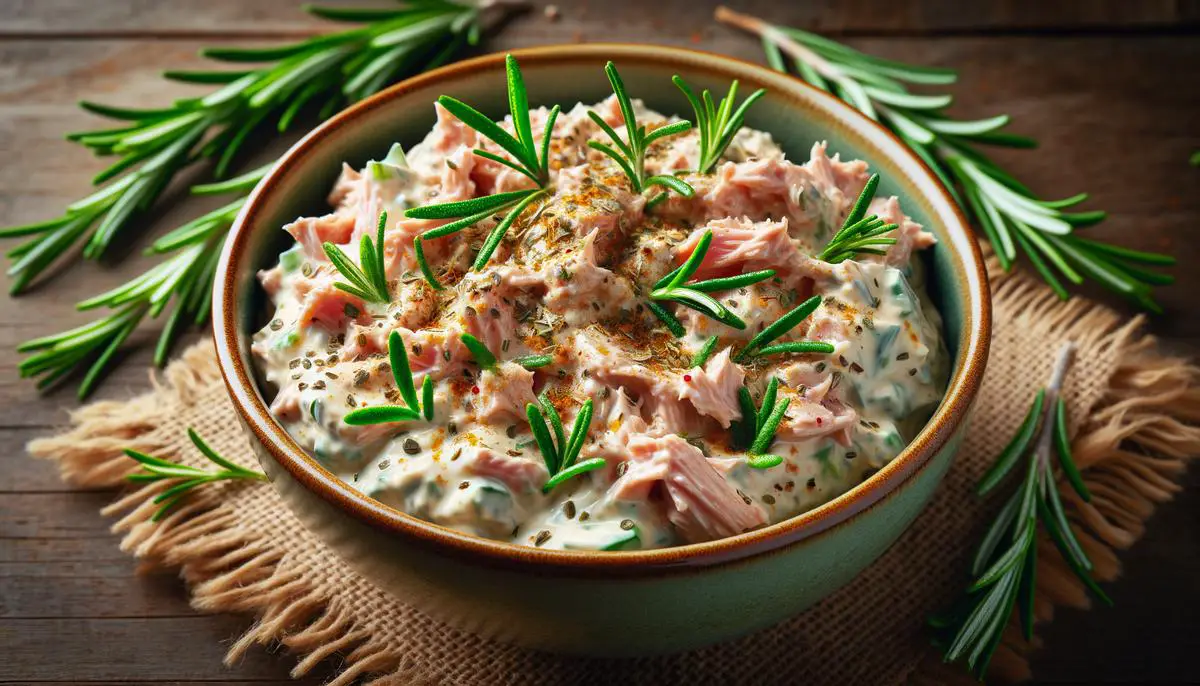
The first step, critical to achieving a superior mix, is selecting the right kind of tuna. Opt for solid white albacore tuna in water. This variety offers a firmer texture and a cleaner taste, providing a pristine canvas for our flavors. Drain it thoroughly to prevent any excess moisture from diluting the mayonnaise’s creaminess.
Choosing the Mayonnaise: A Balancing Act
Mayonnaise choice is pivotal. Aim for a full-fat version for its luxurious mouthfeel and balanced tanginess. It acts as the glue uniting our ingredients into a harmonious blend.
The Mix-ins: Fine-tuning Flavors
Here’s where personal taste steers the ship. Start with finely chopped celery for a subtle crunch, and red onions for a slight kick. The proportions are not set in stone, adjust based on your preference. However, restraint is key; our goal is to accentuate, not overpower.
Seasoning: The Deal Breaker
The real magic happens here. A squeeze of fresh lemon juice, a pinch of salt, and a grind of black pepper are obligatory, instantly lifting the mix. For an adventurous twist, a dash of paprika not only adds warmth but also introduces a smoky undertone.
Herbs: The Final Flourish
Fresh herbs transform the mix. Chopped parsley or chives infuse freshness and a pop of color. Consider basil for a fragrant twist. Remember, the herbs should not dominate but whisper their presence.
Combining: The Technique
Gently fold the ingredients together until just combined. Overmixing can break down the tuna too much, leading to a pasty texture. Let the mix sit for at least ten minutes before serving. This resting period allows flavors to meld and deepen.
Serving Suggestions: Beyond the Bread
While the tuna mayo mix is a sandwich classic, consider using it as a filling for tomatoes or avocados for a low-carb alternative. It also shines as a salad topping, adding protein and creaminess to greens.
In crafting the most flavorful tuna mayonnaise mix, the secret lies within the simplicity of ingredients and the care in combining them. Armed with these tips, what emerges is not just a filling for a sandwich but a testament to the elegance of flavors when balanced with precision.
Onigiri Shaping
Shaping Onigiri by Hand or Mold: The Essential Guide
The assembly of an onigiri, be it by hand or mold, is where the magic happens, transforming simple rice into a convenience meal that carries the essence of comfort food in Japanese culture. Let’s dive straight into how to achieve that perfect shape, whether you’re using the traditional hands-on approach or opting for the precision of a mold.
Hand-Shaping Basics:
- Preparation is Key: Begin by wetting your hands with water to prevent the rice from sticking. A touch of salt on your palms not only adds a hint of flavor but also acts as an effective non-stick agent.
- Forming the Core: Grab about a half-cup of your seasoned rice. Flatten it slightly and place a dollop of your chosen filling in the center. This could be the tuna mix you’ve mastered from the previous step or any other preferred filling.
- The Art of Shaping: Cup your hand slightly and place the filled rice onto one palm. Use your other hand to cover the rice and start shaping. For a traditional triangle (samgak onigiri), press lightly while turning the rice in your palms, forming sharp edges and corners. For a ball or rounded shape, gently rotate the rice in your hands without applying too much pressure.
- Final Touches: Once you’re satisfied with the shape, you can wrap the onigiri in a strip of nori (seaweed) for added flavor and ease of eating. The nori also serves as a moisture barrier, keeping your hands dry.
Mold Mastery:
- Prep Your Mold: Just as with hand-shaping, ensure your mold is slightly wet to prevent sticking. This little step makes a big difference in the release after shaping.
- Filling the Mold: Fill half of the mold with rice, making a small indentation in the center for your filling. Add the filling but be careful not to overstuff; there should be enough room for the remaining rice.
- Seal and Shape: Cover the filling with more rice, ensuring it’s neither too packed nor too loose. Place the lid on top and press down firmly but gently. The goal is even pressure to ensure the rice bonds without becoming mushy.
- Release and Wrap: Open the mold and gently release your perfectly shaped onigiri. Wrap a strip of nori around the base for that final traditional touch.
Whether by hand or by mold, the essence of onigiri lies in its simplicity and the personal touch one adds through the process. Remember, practice makes perfect, and even the mishaps along the way contribute to the narrative of your culinary journey. With these steps, you’re well on your way to mastering the art of onigiri shaping, adding another skill to your culinary repertoire that’s as enjoyable to make as it is to eat.

Mastering the simple practices of cooking rice perfectly for onigiri, blending a delectable tuna mayonnaise mix, and shaping onigiri by hand or mold isn’t just about following steps. It’s also an invitation to imbue love and personality into our cooking. Through understanding the importance of each ingredient and technique, we transform basic components into creations that delight and comfort. This exploration not only enhances our culinary skills but also enriches the experience of those we share our meals with, making every bite a testament to the care and thought we’ve invested.