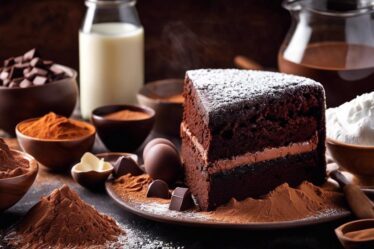
The art of cake baking and decoration transports us to a world where culinary precision meets aesthetic opulence, particularly in the crafting of a stunning 5-layer torte cake. Embarking on this baking journey, we set out to master the nuanced techniques that promise even and consistent layers, the cornerstone of our towering creation. This essay serves as a guide for both novice and seasoned bakers, offering essential insights into mixing the perfect batter, optimizing baking time, and maintaining temperature control. Crucially, it also provides invaluable advice on selecting the appropriate pans to ensure uniform thickness across each delectable tier. With these foundational elements in place, the stage is set for the grand act of assembling a torte that not only tantalizes the taste buds but also captivates the gaze.
Baking the Layers
Crafting the Perfect Torte: Secrets to Even Layers Every Time
Are you ready to elevate your baking prowess to the stuff of dessert legend? Crafting a torte with even, beautifully structured layers is an art form—one that tantalizes taste buds and wows dinner guests. Let’s delve into the essentials for ensuring every torte layer you bake is the epitome of perfection. Prepare to be the architect of a dessert masterpiece!
First, the Mirage of the Measuring Cups: Begin with Precision
Achieving uniformity starts well before the oven preheats—it’s in the very act of measuring ingredients. A reliable scale is the trusty companion of choice. Think of it as the architect’s ruler; it ensures that the foundation is precise. Weigh your ingredients with care, and your layers will thank you later.
The Zen of Baking Strips: Temperature Mastery
Embrace the magic of baking strips, those humble heroes of the baking world. By dampening and fastening these fabric strips around your cake pans, you equalize the heat distribution. This prevents the exteriors from cooking faster than the centers, promising an even rise and a consistent thickness.
The Eureka Moment: Pan Prep and Portioning
Where many a baker’s tale takes a turn, careful preparation of pans can dictate the success of each layer. Always line your pans with parchment paper to help layers glide out effortlessly after their oven soiree. And let’s talk portioning; a kitchen scale or measuring cups can dispense batter with equal proportion. Consistency is your mantra—you want the same depth of batter in each pan.
The Symphony of the Oven: Rotating Rhythms
Ovens are peculiar beasts; no two are quite the same. Hot spots can play favorites with parts of your torte, leading to an uneven rise. Halfway through the baking time, rotate your pans 180 degrees to encourage a more even flirtation with heat. Like a conductor leading an orchestra, you’re ensuring every section plays in harmony.
Cool Runnings: Patience Brings Perfection
Once out of the oven, the torte needs a moment—a brief respite on a cooling rack. Ten minutes to set, then gently remove from the pans to cool completely. It’s a test of patience, but cooling ensures the structure sets and prevents a tragic collapse. An even layer is a cooled layer.
The Finishing Touch: Leveling for Elegance
Even with all these measures, a perfect rise might evade you. Fear not, for the cake leveler is your final act of finesse. A gentle sawing motion, while the cake is firm (but not frozen), shaves off any unruly dome or unevenness. This leaves you with layer upon layer of structural integrity that’s ready to stack with confidence.
And with that, your torte layers are set to stack up to your culinary ambition. Each slice will reveal the even layers of your labor, while your guests marvel and muse over the symmetrical beauty. Baking, after all, is a blend of science and soul—combine them right, and you’re not just baking; you’re creating moments, one even layer at a time.

Assembling the Torte
Title: Crafting the Quintessential Layered Torte: Assembly Alchemy
Ah, the multi-layer torte! This show-stopper of a dessert can turn any gathering into a festive occasion. Once the cake layers have cooled and the countertop looks like the aftermath of a sweet symphony, it’s time for the magical transformation. But fret not! Here’s the nitty-gritty on how to stack and frost your way to perfection.
Welcome to the grand act of Assemblage Artistry. Forget abracadabra; the real magic is in technique and the embrace of a little finesse.
First off, let’s talk about the Trusty Dowel Trick. When dealing with particularly tall tortes or those prone to the Leans of Pisa, sturdy cake dowels are the backbone (literally) of your dessert. Gently push them into the base layer at strategic spots to add support, ensuring the tiers above don’t play a domino dive. Snip them flush with the cake surface, and rest easy knowing your masterpiece won’t topple.
Now, cue the Spackle with Splendor stage – call it frosting, icing, or your sweet mortar; mastering this step is key. An offset spatula is the tool of the trade here, affording precision and grace as you spread an even layer between your cake tiers. Too thick and your masterpiece will resemble a cream slip-and-slide, too thin and you’ll be shortchanging the flavor. Aim for the Goldilocks zone – just right.
Drifting onto the High-Stack Harmony phase, precision remains our loyal companion. Each layer must align with its predecessor, creating the straight lines that are the hallmark of a professionally assembled torte. A turntable can be your true companion here, spinning your creation as you guide each layer into place with the care of an artist. A look from above, a tap to adjust, and you’re setting the stage for stability and beauty in every slice.
And let’s not sidestep the Finesse of Frosting – the crumb coat. This thin layer of frosting catches any stragglers or loose crumbs before they sully your final coat. Chill the torte post-crumb coat to set the scene. It’s your insurance policy for a crumb-free final presentation, crucial for lighter-colored frostings that reveal all.
Once the crumbs are under wraps, the Grand Finale of Frosting can begin. Apply your final coat generously, sweeping over the sides and top with indulgent care. Smooth and swirl with your spatula, breathing life into grooves and peaks, or opt for a sleek and refined surface that whispers elegance.
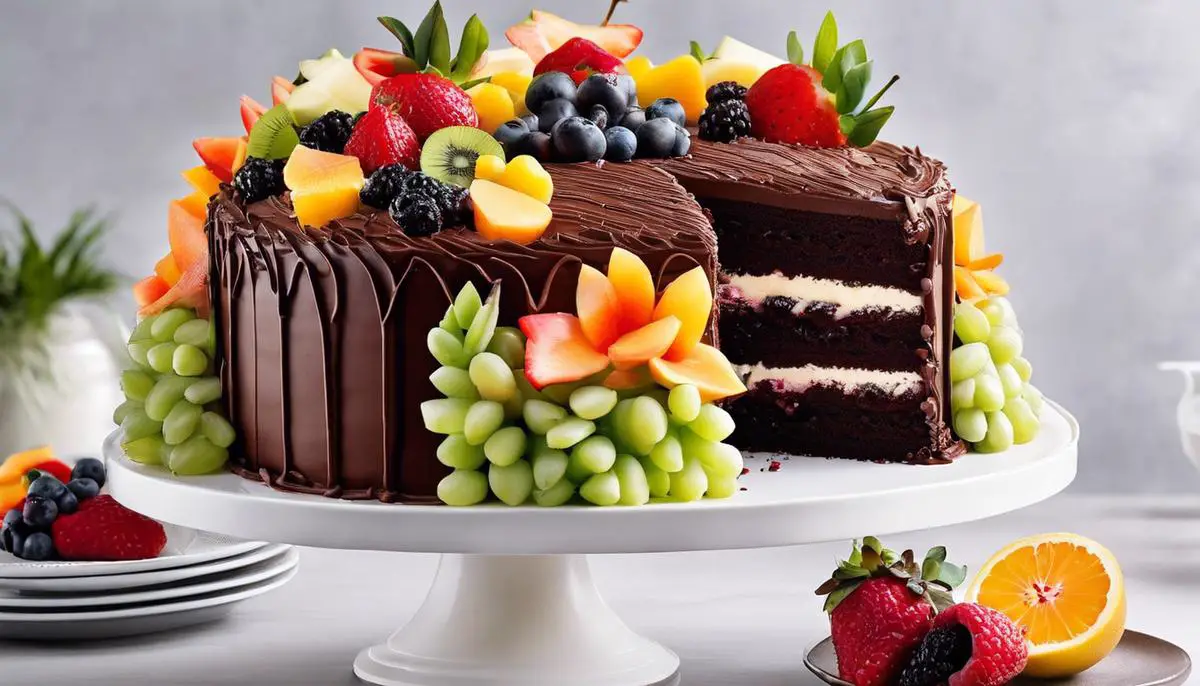
For those who adore the Brush of Brilliance, now is the time to play. Garnishes aren’t just an afterthought; they’re the crown jewels of your creation. Fresh fruit, chocolate shavings, edible flowers, or intricate piping; let imagination paint the finishing strokes.
In the end, the multi-layer torte isn’t just a dessert; it’s a centerpiece, a conversation starter, a testament to the skill and devotion poured into it. Remember, the joy is as much in the journey as it is in the indulgence. Happy stacking!
Decorating Techniques
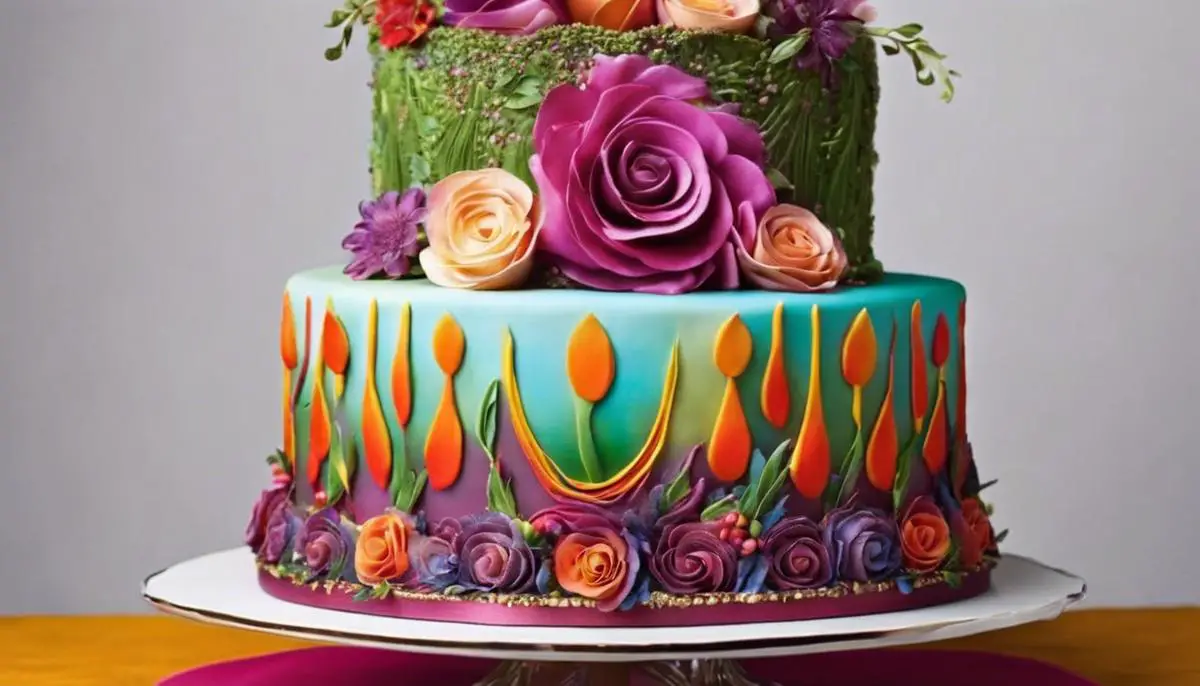
The Artistry of Torte Adornment: Elevate Your Baking Game
You’ve meticulously measured, mastered the bake, prepped your pans with fervor, and nailed the symphony of rotations. The cool-down was a test of resilience, and your leveling was nothing short of sublime. With layers stacked in a perfect high-stack harmony and the crumb coat and finale of frosting applied with the finesse of a maestro, your 5-layer torte is now awaiting its crowning glory. Let’s turn this scrumptious structure into a visual symphony that will captivate the eyes as much as it will enthral the taste buds.
Chocolate Collar CoutureTo immediately elevate your torte to new heights, wrap it in a chocolate collar. This is, essentially, a band of tempered chocolate that clings to the sides of your creation, bringing texture, sheen, and that irresistible snap. Measuring the circumference and height of your torte, cut a strip of parchment to use as a guide. Pour tempered chocolate over the parchment, and once it’s slightly set but still malleable, wrap it snugly around the torte. Let it harden completely, and then gently peel away the parchment. The result? A mesmerizing chocolate embrace that is a joy to break into.
Piped PerfectionPique your guests’ curiosity with piping prowess. Imagine delicate lacework, ornate rosettes, or a cascade of buttercream ruffles adorning the top and edges of your masterpiece. Dive into the tangible thrill of a piping bag filled with tinted frosting, and let your creativity flow. Employ different tips to present a panorama of patterns, from star-shaped to petal-like splendor, each one contributing its own unique texture and movement. Invite this flourish to be the talk of the table, an edible story of attention to detail and artistic spirit.
Fruit FlamboyanceFruit can bring a vibrant flourish to your torte that’s undeniably fresh and alluring. Whether strategically placed atop your torte like precious jewels or finely sliced and fanned out in an ombre effect across its tiers, the color contrast and natural sweetness of fruit not only looks amazing but also adds an extra dimension of flavor. Consider the juiciness of berries, the sleek slices of kiwi, or the citrus twirls of lemon and orange zest – their bold colors painting a feast for the senses.
Edible Gold Leaf EleganceFor the torte that seeks to whisper (or shout) luxury, edible gold leaf is the way to go. It’s the opulent touch that sets a simple dessert onto the pedestal of haute cuisine. Applying delicate sheets or flakes of gold leaf might demand a steady hand and the patience of a saint, but the outcome is thoroughly regal and enchanting. Distribute it sparingly for subtle sparks of grandeur or fully clad a layer for the ultimate statement of indulgence.
Mirror Glaze GalaxyHere’s to the torte that looks back at you. With the magic of a mirror glaze, create a top layer that’s so glossy it could double as your vanity mirror. Tint your glaze with beguiling hues and then pour it over your chilled cake to create a glass-like sheen. For the adventurous soul, a swirl of colors can transform your torte into an otherworldly emulsion of hues, evoking the mystique of a distant galaxy.
Your 5-layer torte is the canvas and your baking arsenal, the brush and palette. With each stroke of imaginative joy and every decorative choice, you are not just finishing a cake; you are creating a moment, a memory—crafting magic one layer at a time. And at the end of this delicious ballet, when forks dive into creamy depths and eyes light up with that first bite, one knows that the true treasure lies within the journey from oven to table. Now, let the feasting and admiration begin.
Through the delicate dance of baking, stacking, and decorating, a beautifully crafted 5-layer torte emerges as a celebration of both flavor and form. With the techniques outlined here, the once daunting task transforms into a joyful endeavor, resulting in a confection that’s as pleasurable to behold as it is to savor. May your newly acquired skills in creating smooth exteriors, aligning layers with precision, and embellishing your cake with decorative flourishes inspire confidence and creativity in your baking endeavors. Let each slice of your magnificent torte stand as a testament to your culinary dedication and artistic flair.