Making rum balls that taste amazing and hold their shape just right is something anyone can do with a bit of guidance. This article will walk you through the steps, from preparing your ingredients to mixing and shaping them into the perfect bite-sized treats. With simple techniques and a little patience, you’ll be creating rum balls that are sure to impress at any gathering.
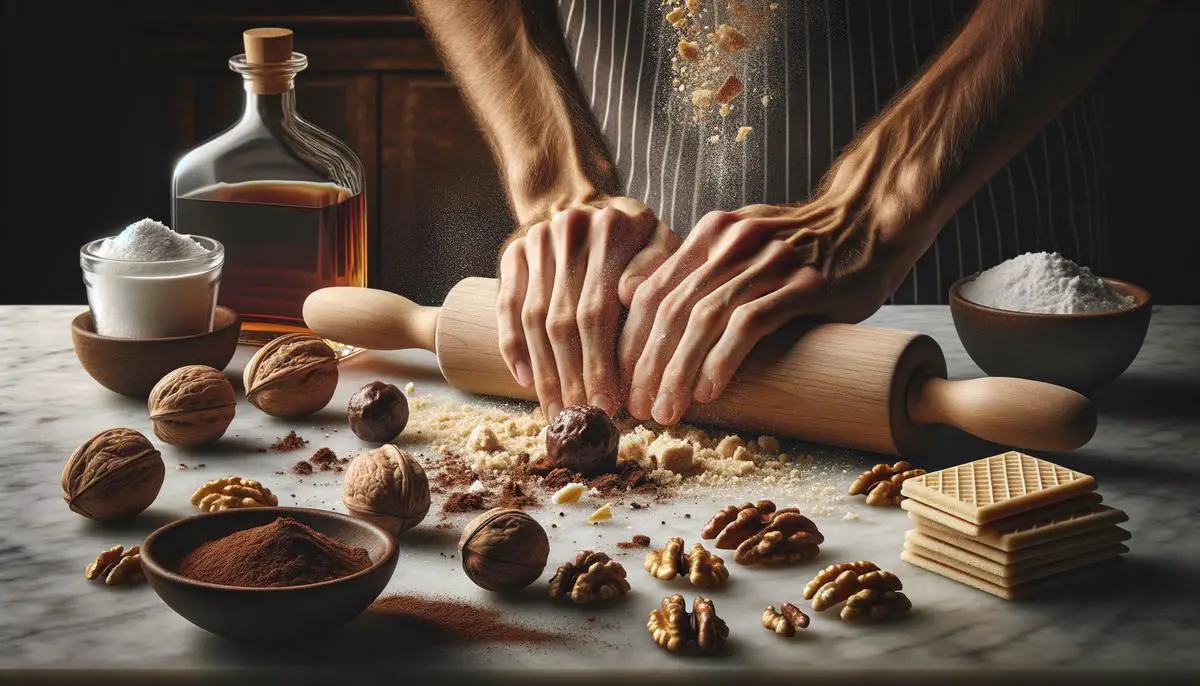
Crushing Ingredients
Achieving the Perfect Texture for Rum Ball Ingredients
When it comes to rum balls, reaching that impeccable balance of moist, flavorful, and easy-to-shape texture is key to creating these boozy delights. With a few simple steps, you’ll be well on your way to whipping up rum balls that not only taste incredible but also hold their shape perfectly for that delightful bite.
Start with the base of your rum balls: the crumbs. Whether you’re using Biscoff or Vanilla Wafers, getting your cookie crumbs to the right fineness is crucial. Use a food processor to blitz the cookies into a fine, sand-like texture. If you don’t have a food processor, seal the cookies in a large, sturdy zip-top bag and crush them with a rolling pin. The goal is uniformity; the finer the crumb, the better the base for your rum balls.
Next, finely chop your nuts—pecans or walnuts are commonly used. These need to be chopped almost to a powdery consistency, but be careful not to turn them into butter. The same tools apply here: a food processor or the trusty zip-top bag and rolling pin duo. These finely chopped nuts will add a fantastic texture and rich flavor to your rum balls, blending seamlessly with your fine cookie crumbs.
With your dry base ready, it’s time to introduce the binders that will transform these powdery crumbs into moldable dough. A mix of sweetened condensed milk and your rum of choice (dark, spiced, or coconut for a twist) does the trick. Add these liquids slowly to your cookie and nut mixture, stirring well until you achieve a moist dough that easily holds together when squeezed. It should be sticky but not overly wet—this balance is crucial for rum balls that are easy to roll and won’t fall apart.
Before shaping, let your mixture chill in the refrigerator for about an hour. This chilling time helps the flavors meld together and makes the dough easier to work with. Once chilled, dust your hands with powdered sugar to prevent sticking, and start shaping your mixture into round, bite-sized balls.
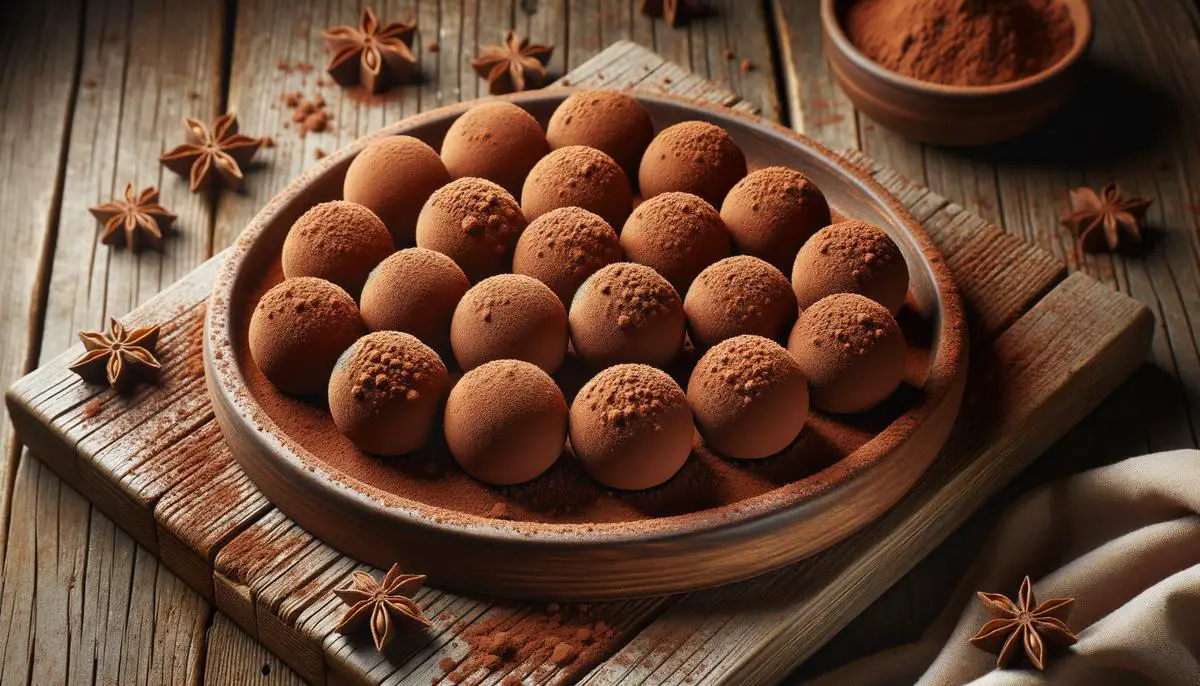
Finally, roll your shaped rum balls into powdered sugar, cocoa powder, or crushed nuts for an added layer of texture and flavor. This outer coating not only makes your rum balls more enticing but also helps keep them from sticking together when stored.
Mixing the Ingredients Properly
To guarantee your rum balls hit the sweet spot in texture—firm yet yielding, with a satisfying chew—it’s all in how you mix them. Let’s zero in on creating that cohesive mixture that binds the ingredients just right.
Pour your liquid binders over your dry mix in a spacious bowl—a bigger bowl than you think you need. This extra space allows you to stir without constraint, ensuring every crumb and nut fragment gets an even coat of the wet mixture. Use a sturdy spoon or spatula for this task; it should give you the leverage needed to mix thoroughly without wearing yourself out.
Employ a folding method rather than vigorous stirring. Scoop from the bottom and fold over to the top, rotating the bowl as you go. This technique ensures that the bottom doesn’t become a soggy layer while the top remains too dry. It’s this gentle, consistent folding that marries the rum and milk with the crumbs and nuts into a cohesive, uniform dough.
If the mixture feels too wet and clumpy, add a bit more cookie crumbs to dry it out slightly. Conversely, if it’s too dry and not sticking together, a tiny splash more rum can remedy that. The goal is a pliable, homogenous mixture that holds its shape when pressed but isn’t sticky or overly wet.
After mixing, allow the mixture to sit for a moment in the bowl. This pause lets the ingredients further meld together and makes for easier shaping later on. When you’re ready to roll, the dough should not stick to your hands or feel too crumbly. It should compact nicely into a ball that holds its shape with a smooth exterior—the hallmark of a perfectly mixed rum ball dough.
Shaping and Coating
Shaping and coating rum balls doesn’t have to be a kitchen chore teeming with mess and stress. To ensure each ball is uniformly delightful, use a cookie scoop—your secret ingredient. Scooping directly from your chilled mixture, use a tablespoon-sized scoop for perfectly portioned delights. This singular action alleviates the guesswork of size consistency and keeps the process running smoothly.
After scooping, it’s time to roll the balls. Given the dough’s inherently sticky nature, even with a pre-chill, you’ll find that a light re-dusting of powdered sugar on your hands works wonders. This barrier allows you to roll the scooped mixture into more refined spheres without the mess, ensuring a smooth finish.
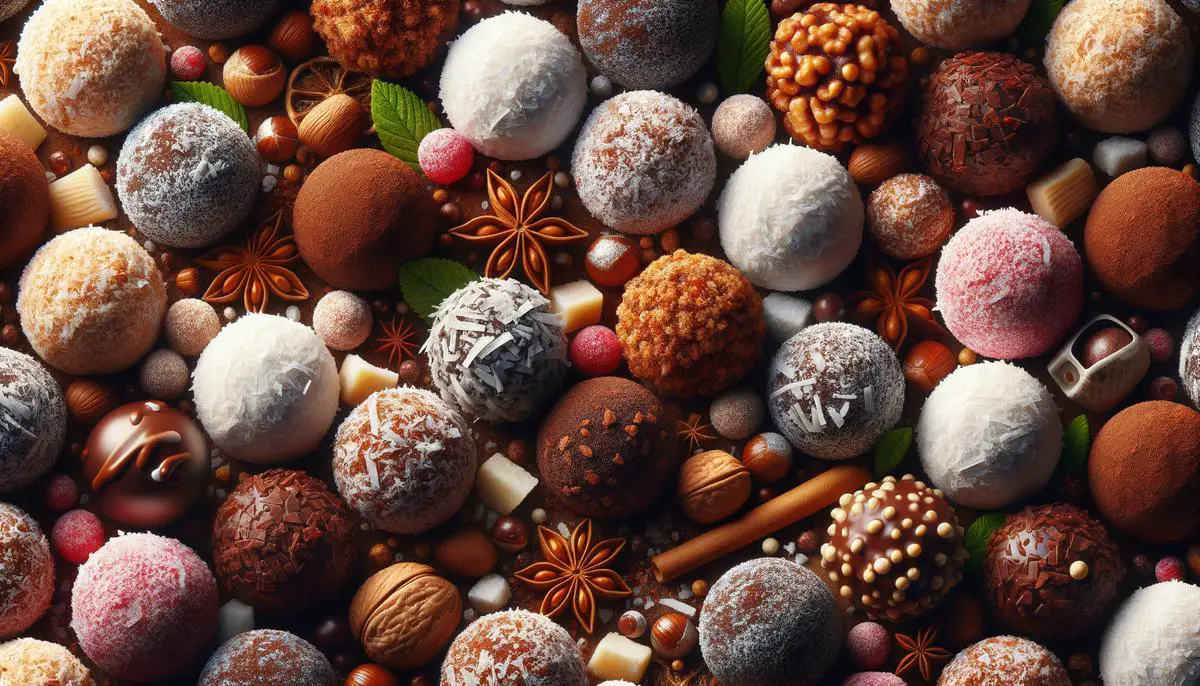
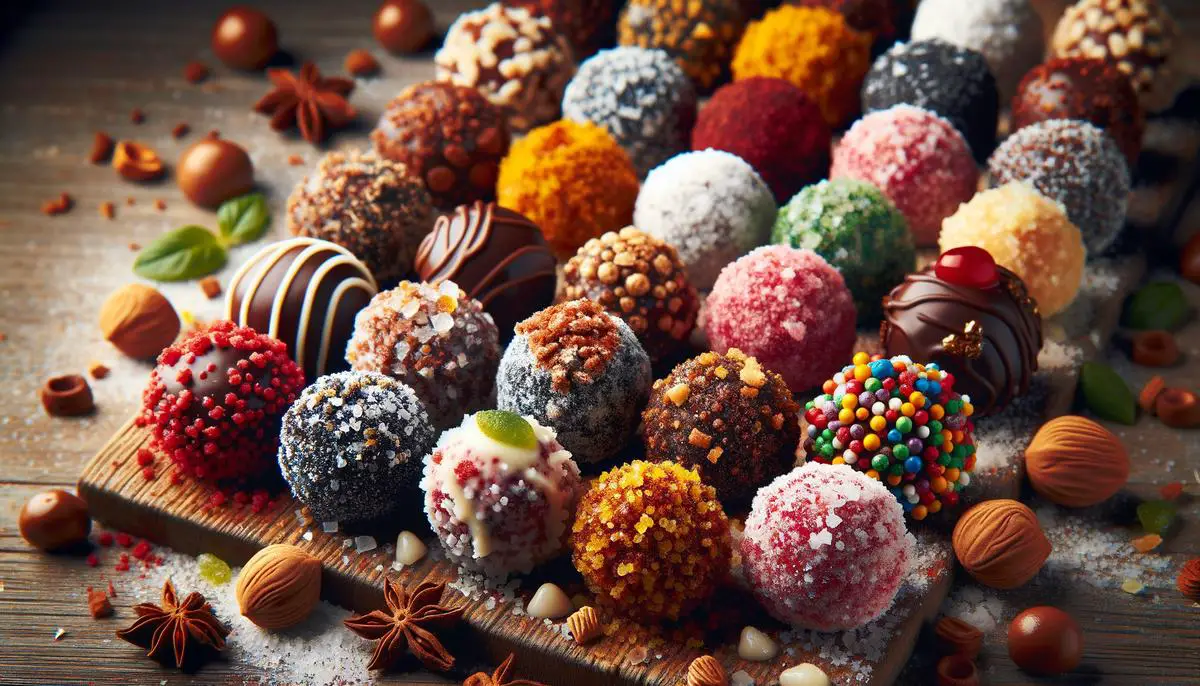
Now comes the fun part: the coating. You have a playground of options:
- The classic powdered sugar cloak
- Rolling them in finely crushed nuts for a textured outer layer
- Rainbow sprinkles for a pop of color
- Green and red sugars for festive holiday adornments
The technique for an even coat is simple but effective: place your choice of coating in a shallow dish. Drop in a ball, and with a gentle, rotating motion using your fingertips or by shaking the dish side-to-side, ensure the ball is completely enveloped in its tasty exterior. This method is efficient and ensures each rum ball is evenly dressed for the occasion.
For an extra touch, try dunking those rum balls into melted chocolate, then chilling until set. Chocolate enrobing is a common technique used in confectionery to add an extra layer of flavor and texture to treats1. This optional step elevates your rum balls from delightful treats to decadent masterpieces, adding a layer of elegance and an extra flavor dimension.
Remember, beyond the technique and choice of coatings, the charm of rum balls lies in their homemade touch. Each ball, a testament to your culinary care, is set to delight. Once coated, chill them once more to set their flavors and textures harmoniously. The result? Easy-to-make, mouth-watering treats that stand as a testament to your effort and creativity in the kitchen. Ready to be shared, savored, and most importantly, enjoyed.
With these tips and tricks under your belt, creating delicious, perfectly textured rum balls is within reach. It’s all about the balance of ingredients, the method of mixing, and the final touches that make each ball special. So go ahead, give it a try and watch as these delightful treats become a favorite among friends and family. Remember, great things come to those who bake!
- Beckett ST. The Science of Chocolate. 2nd ed. Cambridge, UK: Royal Society of Chemistry; 2008.