Embarking on a culinary adventure can be as thrilling as it is delicious, especially when it involves the transformation of fruits into succulent spreads like pomegranate jellies. Diving into the vibrant world of pomegranate jelly-making opens up a treasure chest of knowledge, starting from hand-picking the ripest jewels of the pomegranate tree to mastering the art of juice extraction. Our journey will unfold the secrets behind crafting that perfectly set, shimmering jelly that gleams like garnet gems in a jar. So, whether you’re a seasoned home-canner or a novice in the kitchen, prepare to be immersed in the step-by-step alchemy of turning the tangy, antioxidant-rich elixir of pomegranate juice into a sweet, delectable preserve.
Preparing Pomegranate Juice
The Art of Pomegranate Juice Alchemy for Exquisite Jelly Creations
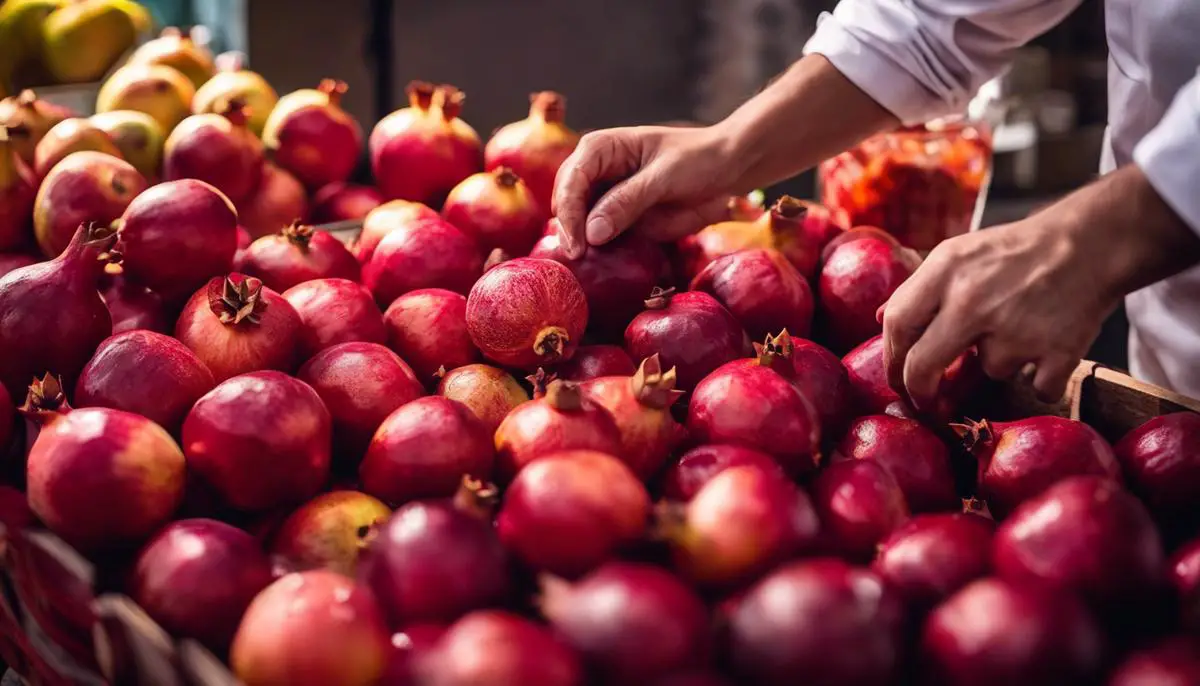
Ah, the pomegranate – that glorious, gem-like fruit that’s as beautiful to behold as it is a delight for the taste buds! Bursting with juicy seeds, it’s a quintessential treasure for culinary enthusiasts looking to add a pop of flavor and color to their creations. Extracting the juice from a pomegranate for jelly making isn’t just a step in a recipe; it’s a ritual that melds the sensual pleasure of tactile fruit processing with the magic of creating a preserve that captures the essence of the fruit. Embrace the mess, savor the process, and let’s dive into the wonderful world of jelly making with the noble pomegranate.
Before rolling up your sleeves and donning your apron, gather the pomegranate overlord and its humble attendants: a paring knife, a bowl of water, a sieve, a wooden spoon, and a reamer or a juicer, if you prefer a tool-assisted approach.
Step 1: Score a Circle
Begin your quest by scoring a shallow circle around the crown of the pomegranate. Essentially, you’re granting yourself permission to access the interior without charging through like a culinary barbarian. Once you’ve removed the crown, you’ll get a peek at the clusters of seeds called arils.
Step 2: Dive In
Score the pomegranate’s skin from crown to stem end along its natural ridges, typically marking about six sections. Here, you are a sculptor, tracing lines to reveal the beauty within.
Step 3: Submerge and Separate
Submerge the prepped pomegranate in a bowl of water. This is where the magic begins. As you break apart the sections under water, the arils surrender, free from their pithy constraints. The water acts as a mediator, preventing the juice from splattering and the pith from hanging on too tightly.
Step 4: Release the Jewels
As you tease the seeds out, they’ll sink to the bottom of the bowl like little rubies, while the pith will float. It’s a beautiful dance between ingredients, as they part ways, making it easier for you to strain and discard the pith.
Step 5: The Alchemy
Once you’ve gathered your treasury of seeds, it’s time to extract the juice. If you’re going the manual route, use a wooden spoon to press the seeds against a sieve set over a bowl, coaxing the juice to seep through. If you bring a reamer or juicer into your ritual, let the machine gently crush the arils, as you get every drop of tart, sweet nectar.
Step 6: Strain the Gains
Pass the juice through the sieve once more to ensure it’s free from any lingering seed bits. This pure elixir you’ve obtained is now ready to embark on its journey, transforming into jelly that will transcend seasons and share the story of the pomegranate’s splendor.
In this pursuit, remember – the pomegranate doesn’t give up its juice easily. It requires patience, perseverance, and a love for the craft. But that’s what cooking and creating in the kitchen are all about, aren’t they? Taking pleasure in the process and the challenge of coaxing out flavors from nature’s provisions. With your freshly procured pomegranate juice, your jelly is set to be not just a spread, but an experience, a memory, a dollop of joy on the palate.
Now go forth, culinary comrades – the pomegranate awaits! And in this messy, delightful kitchen ballet, you’ll not only find juice for your jelly but also an intoxicating joy in the art of creation.

Jelly Cooking Technique
Once you’ve reveled in the meditative process of extracting pomegranate juice and celebrated the vibrant liquid you’ve obtained, it’s time to journey into the alchemy of turning it into a luscious jelly. Cooking pomegranate jelly is a delicate dance between art and science, but worry not—follow these steps, and you’re in for a jar of glistening, burgundy perfection.
Gather your sugar, pectin, and a splash of lemon juice—the companions to your star ingredient, pomegranate juice. Pectin is essential, as it’s the natural thickener that will coax the juice into a jelly. And let’s not forget the lemon juice, which adds not only a tangy brightness but also ensures the pectin does its magic.
Before you begin, place a few small plates in the freezer. Trust this little trick—you’ll thank it later when testing your jelly’s consistency.
Now, in a thick-bottomed pot, combine every drop of painstakingly extracted pomegranate juice with sugar. The sugar ratio is crucial, not just for sweetness but for preservation. As a rule of thumb, use about ¾ cup of sugar for every cup of juice. Next, let lemon juice join this symphony, with a ratio of one tablespoon for every two cups of juice.
Crank up the heat to medium-high and stir the mixture gently but consistently. Dissolving the sugar is the first checkpoint in this culinary race. Once you’ve crossed it, sprinkle in the pectin and whisk it in like your last dance. After all, no one wants pectin clumps in their jelly.
As this scarlet liquid begins to bubble, don’t shy away from it; instead, cheer it on. A rolling boil is what you’re after—a boil that doesn’t quiet down even as you stir. Keep this boil going for a minute or so, ensuring all the pectin has been activated and the mixture is uniform.
Lower the heat and retrieve one of your chilled plates. Spoon a smidge of the jelly onto it, and return it to the freezer. Wait a minute—literally, just sixty seconds—then run your finger through the jelly. If it wrinkles and holds its shape, your jelly has reached the pinnacle of perfection. If it’s still runny, continue the boil and check again.
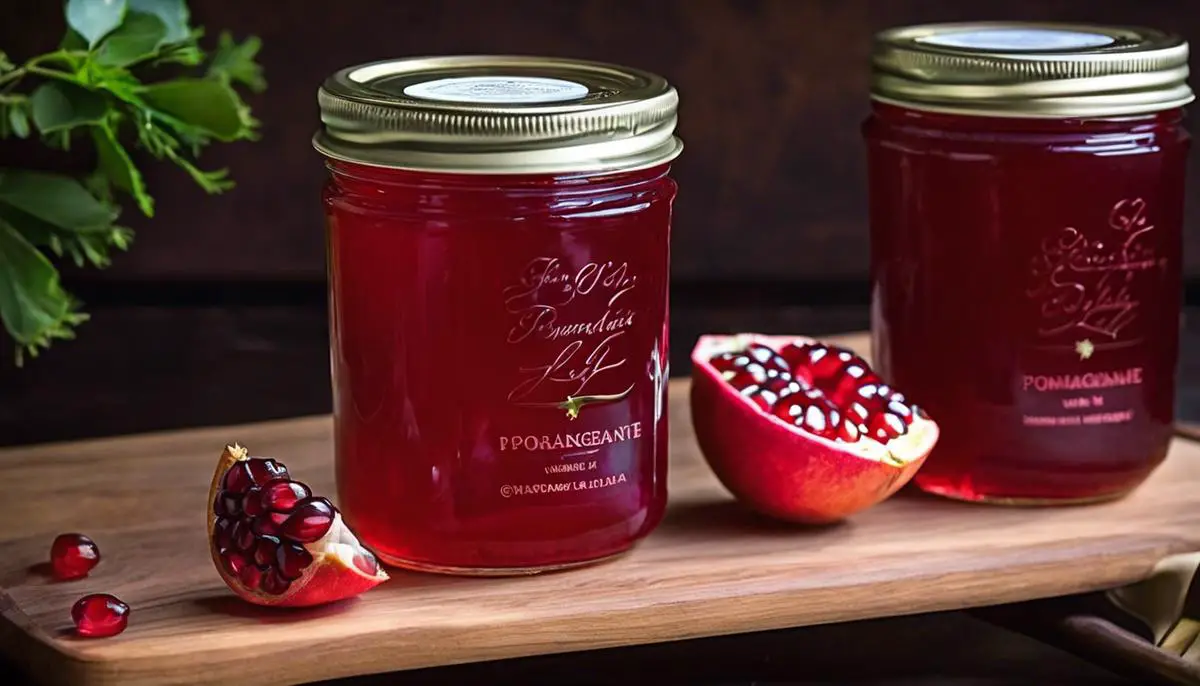
Once the jelly passes the wrinkle test, it’s time to bottle up this pomegranate treasure. Fill sterilized jars, leaving a quarter-inch of headspace, seal them with love, and process them in a water bath to ensure they are shelf-stable.
Open up your kitchen window and let the sweet, tangy aroma of pomegranate jelly waft through. Imagine the rolls of bread, the layers of cakes, and the swirls in yogurts that this gem will grace. Cooking pomegranate jelly to the perfect consistency is truly a celebration of the senses, a melding of time-honored techniques with the simple, yet profound pleasure of crafting something by hand. Now go ahead, spread the joy—there’s nothing like sharing a jar and watching eyes light up as tart, sweet, and smooth textures play on palates, connecting us through the universal language of irresistible flavors.

Canning and Preservation
Once you’ve immersed yourself in the delightful process of making pomegranate jelly, bottling it safely for long-term storage is like putting the final seal on a treasure chest of flavors. This is where the world of canning opens up, a technique as rewarding as it is meticulous, ensuring those ruby-red jars can be savored long after pomegranate season wanes.
Now, before we dive in, remember to always work in a clean kitchen! Canning is equal parts science and art, and cleanliness does matter.
Step 1: Sterilize Your Canning Jars
Fire up the stove, friends! Begin by filling a large canning pot with enough water to fully cover your jars by at least an inch. Once the water is simmering, submerge the jars and lids for around 10 minutes to sterilize them. No shortcuts here; this step is crucial for preventing bacterial growth. After sterilizing, remove them using canning tongs, then drain and set them on a clean, dry towel.
Step 2: Fill Your Jars with Pomegranate Jelly
Ladle the warm pomegranate jelly into the sterilized jars, leaving about 1/4 inch of headspace at the top. That little air gap is needed to create a vacuum seal later. Be meticulous and wipe any splashes off the rims with a clean cloth or paper towel because any remnants might prevent a proper seal.
Step 3: Secure the Lids
Place the flat lids on the jars and gently screw on the bands until they’re snug but not overtightened. The air still needs to escape during the next part to form that important seal.
Step 4: Process the Filled Jars
Return your jars to the water bath in the canning pot, ensuring they’re covered by at least an inch of water—the more the merrier. Once the water hits a rollicking boil, start your timer. Recommendation guides suggest a processing time anywhere from 5 to 15 minutes, depending on your altitude—higher altitudes require more time.
Step 5: Testing the Seal
After processing, carefully remove the jars and let them cool untouched for 24 hours. No poking, no prodding – let them be. You’ll likely hear a series of satisfying pops as the lids seal.
Step 6: Check the Seal
To check the seals, press the center of each lid after 24 hours. If it doesn’t pop back, your seal is set, and that jar is ready for long-term storage in a cool, dark place.
It’s important to label your jars with the canning date, and know that properly canned and sealed jelly can last up to a year (or even longer if conditions are ideal). If you find any lids that didn’t seal, no worries—just refrigerate that jelly and make it the star of your breakfast lineup.
Canning pomegranate jelly is like capturing the essence of a joyous kitchen endeavor and sharing it with your future self or loved ones. With each pop of a jar lid throughout the year, you’ll be reminded of the love poured into every step, from juicing those pomegranates to perfecting the set of your homemade jelly. Now, who’s ready to start spreading that joy?
Mastering the art of pomegranate jelly-making is a rewarding process that culminates in the pleasure of spreading a homemade jewel-toned preserve onto your favorite foods. The essential combination of ripe fruit, precise cooking, and proper canning techniques ensures not only the enjoyment of creating a delicious product but also the safety and satisfaction of sharing your culinary creation with others. May the skills and knowledge gained on this gelatinous journey enrich your repertoire and blend seamlessly into your seasonal traditions, enhancing every toast with a dollop of homemade sweetness.