Making a pear crisp is an exciting adventure in the kitchen that combines selecting the right type of pears with preparing them just so, to create a dessert that’s both comforting and impressive. This guide will walk you through each step, from choosing the best pears to laying down that crumbly topping, ensuring your pear crisp turns out perfectly every time.
Selecting and Preparing Pears
Choosing and Preparing Pears for a Pear Crisp
When making a pear crisp, selecting the right pears and preparing them correctly is key to achieving the perfect blend of tender, sweet fruit under a golden, crumbly topping.
1. Pick the Perfect Pear Variety
Not all pears are ideal for baking a crisp. You want pears that hold their shape but become soft when baked. Bartlett, Bosc, or D'Anjou pears are the best choices, ensuring your crisp isn't mushy or full of hard, uncooked pear pieces.1
2. Timing is Everything
Pears can be tricky when it comes to ripeness. Buy your pears a few days before baking and let them ripen on the counter until they yield slightly to gentle pressure.
3. Prepping Your Pears
- Wash the pears under cool water to remove any dirt or residue.
- Peel the pears, as the skin can become tough and chewy in a crisp.
- Cut the pears in half from top to bottom and use a small spoon or a melon baller to remove the core and seeds, ensuring every bite is just tender, flavorful pear.
4. The Cut Counts
Cut the pear halves into evenly sized slices or chunks, about ¼ inch thick, for the perfect texture.
5. Final Touches Before Baking
Toss the prepared pear slices in a mixture of spices like cinnamon, nutmeg, and a bit of sugar if needed. This adds depth to their flavor and draws out some of their juices, ensuring the pear crisp has the right amount of sauciness.
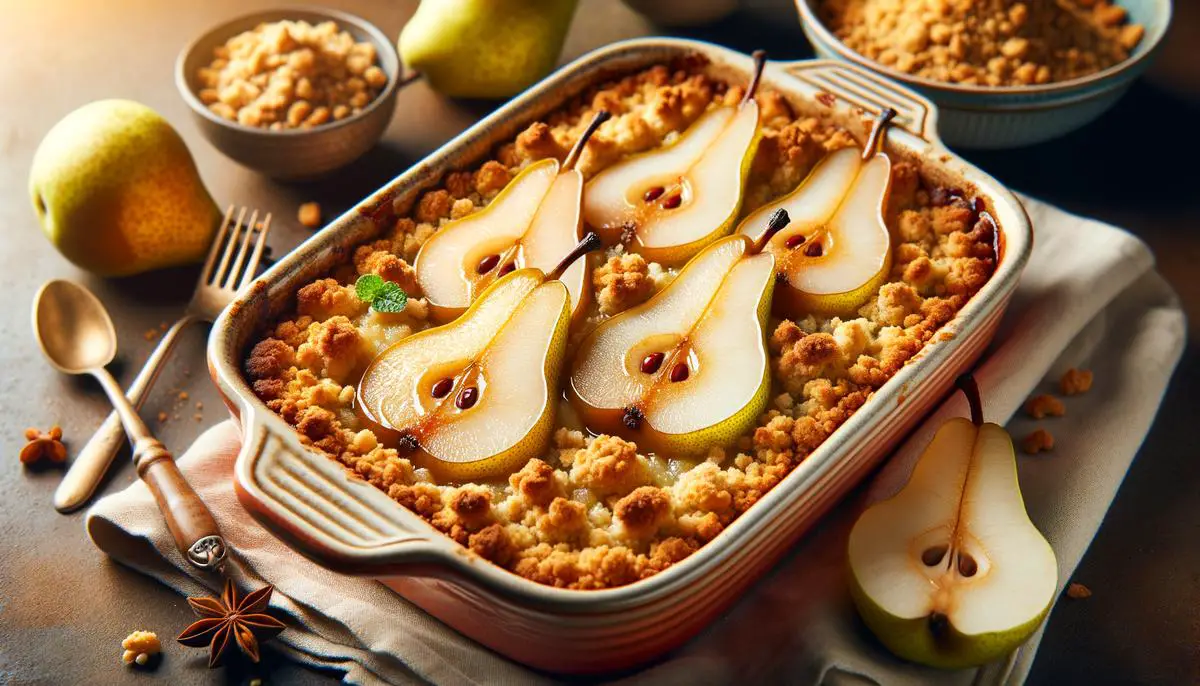
Spread the pears in your baking dish and cover with your crumbly, buttery, oat-laden topping before baking.
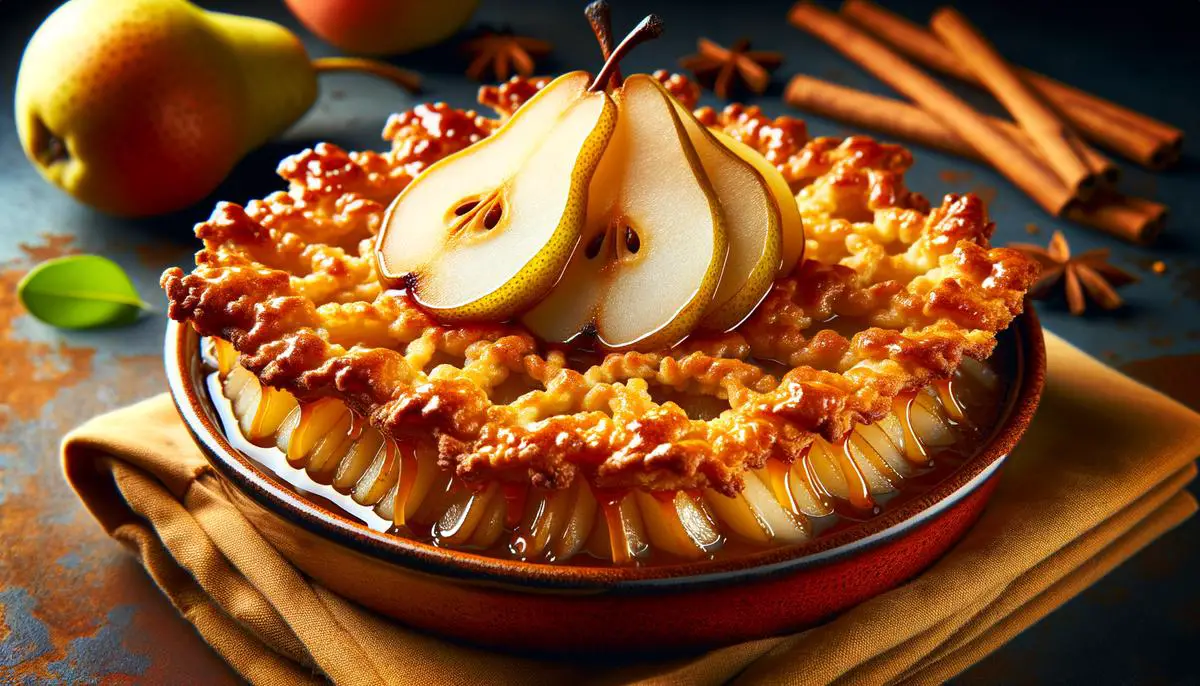
Creating the Crumble Topping
The secret to nailing the perfect crumble topping is crucial for your pear crisp. Here's how to achieve that delightful, crunchy texture contrasting with the soft, succulent pears underneath.
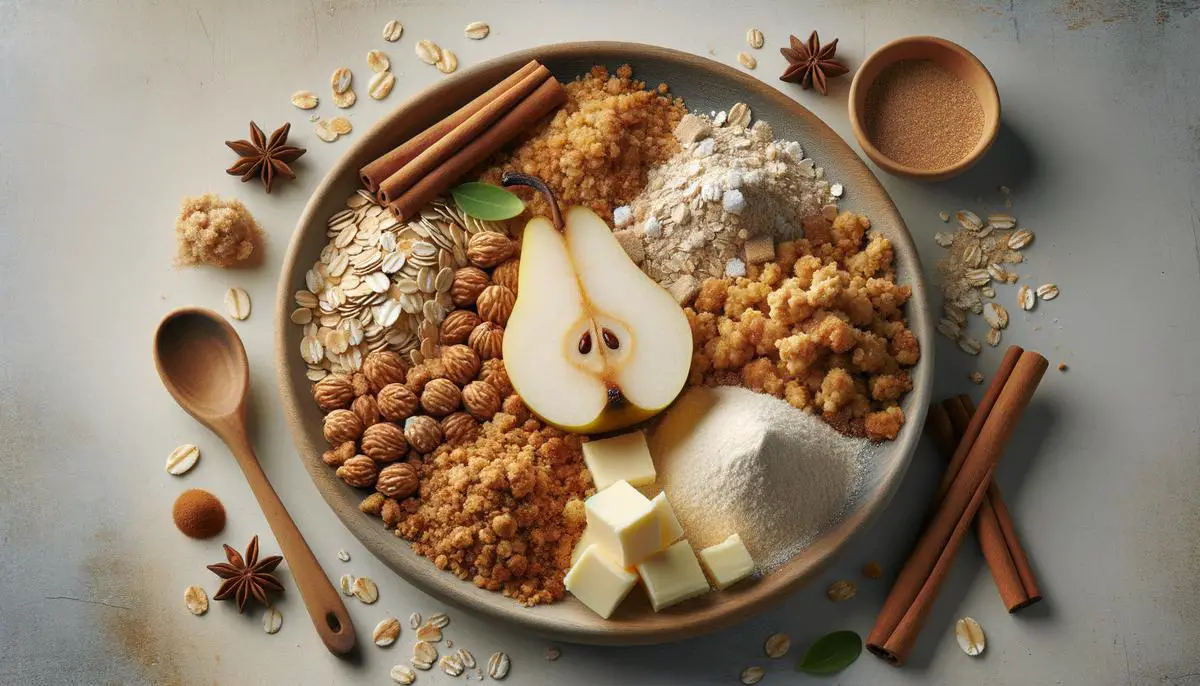
The ingredients matter. You'll need:
- Old-fashioned whole oats
- Flour (regular or gluten-free)
- Brown sugar
- Salt
- Cinnamon
- Fat – butter or hardened coconut oil for a dairy-free option
Oats offer a hearty bite, flour binds without stealing the show, brown sugar adds sweetness with an edge, cinnamon provides warmth, and the fat ensures a crumbly texture.
Get the proportions right to avoid a cakey or sandy topping. Start with equal parts oats and flour, adjusting slightly for your texture preference. The fat should be about half the amount of your dry base.
Mix the dry ingredients first. Add cold, hard fat in cubes or spoonfuls and rub it into the dry mix until you have a crumbly texture with some pea-sized bits sticking together with smaller crumbs.
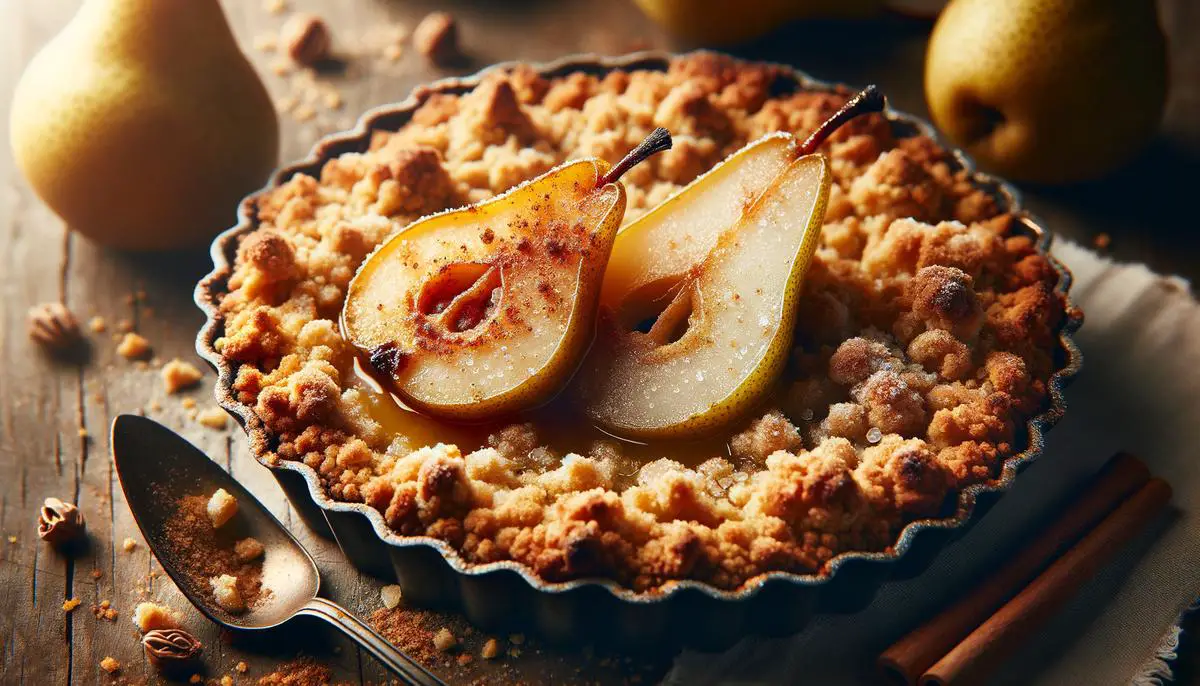
Sprinkle the topping evenly over the pears, allowing a few pear bits to peek through. Avoid a thick layer that may steam rather than crisp.
Bake at 375°F for the perfect balance of a rich, melted blend of flavors from below with a toasted yet tender crisp on top.2
Let the crisp cool for a moment out of the oven to allow the flavors to meld and the structure to set for the perfect spoonful.
Baking to Perfection
With your pear crisp assembled, it's time to bake this delightful treat. The secret to achieving a golden crust on top while ensuring tender pears is all in the baking time and temperature.
Preheat your oven to 375°F (190°C). This temperature is hot enough to cook the pears through, allowing the sugars to caramelize, while also getting the topping crispy without burning it.
Place your baking dish in the oven and set a timer for 40 minutes. You're aiming for a bubbling, soft pear mixture beneath a crunchy, golden-brown top. Start checking your pear crisp around the 35-minute mark, as ovens can vary.
If the top isn't as golden as you'd like, let it bake for an additional 5 to 10 minutes, keeping a close eye to prevent burning. The aim is a topping that offers a satisfying crunch while being met with the soft, sweet warmth of the spiced pears.
Once your pear crisp is beautifully browned and bubbling around the edges, carefully remove it from the oven. Allow it to cool for 10 to 15 minutes. This short wait prevents burning your tongue and allows the pear mixture to thicken slightly, making serving easier and ensuring the perfect mix of textures.
Serve the pear crisp as is or pair it with a scoop of vanilla ice cream for an extra layer of indulgence. Enjoy the fruits of your labor and let the feast begin!
With your pear crisp now ready to enjoy, you’ve seen how simple choices in selecting and preparing ingredients can lead to extraordinary results. The warmth of the oven transforms humble pears and a handful of pantry staples into a dessert that speaks volumes of care and craftsmanship. So as you serve up this delightful treat, remember it’s not just about satisfying sweet cravings—it’s about creating moments worth savoring. Here’s to many more successful bakes!
- Nguyen H, Wismer WV. A Comparison of Sensory Profiles of 'Bartlett' and 'Anjou' Pears Using Descriptive Analysis. J Food Sci. 2018;83(4):1076-1083.
- Rombauer IS, Becker MR, Becker E. Joy of Cooking. New York, NY: Scribner; 2006.