Embarking on a delightful culinary journey that marries the charm of traditional cakes with the whimsy of icy treats, cake popsicles emerge as a uniquely sweet sensation. Perfect for parties, special occasions, or just a creative kitchen experiment, these treats blend the rich, tender crumb of a freshly baked cake with the irresistible form of a popsicle. We’ll start by guiding you through the process of baking a cake base that is not only moist and fluffy but also robust enough to shape into popsicle perfection. With precise ingredient selection, meticulous mixing methods, and precise baking times, you’ll have the ideal foundation for your next dessert creation. Transforming this exquisite base into delectable popsicles will be your next conquest, as you learn the artistry of shaping and molding. Whether you choose to use specialized equipment or handcraft your shapes, the techniques detailed here will ensure that your cake popsicles freeze into an enchanting treat that’s as fun to make as it is to eat.
Baking the Cake Base
The Secret to Crafting Moist Cake Popsicles Every Time
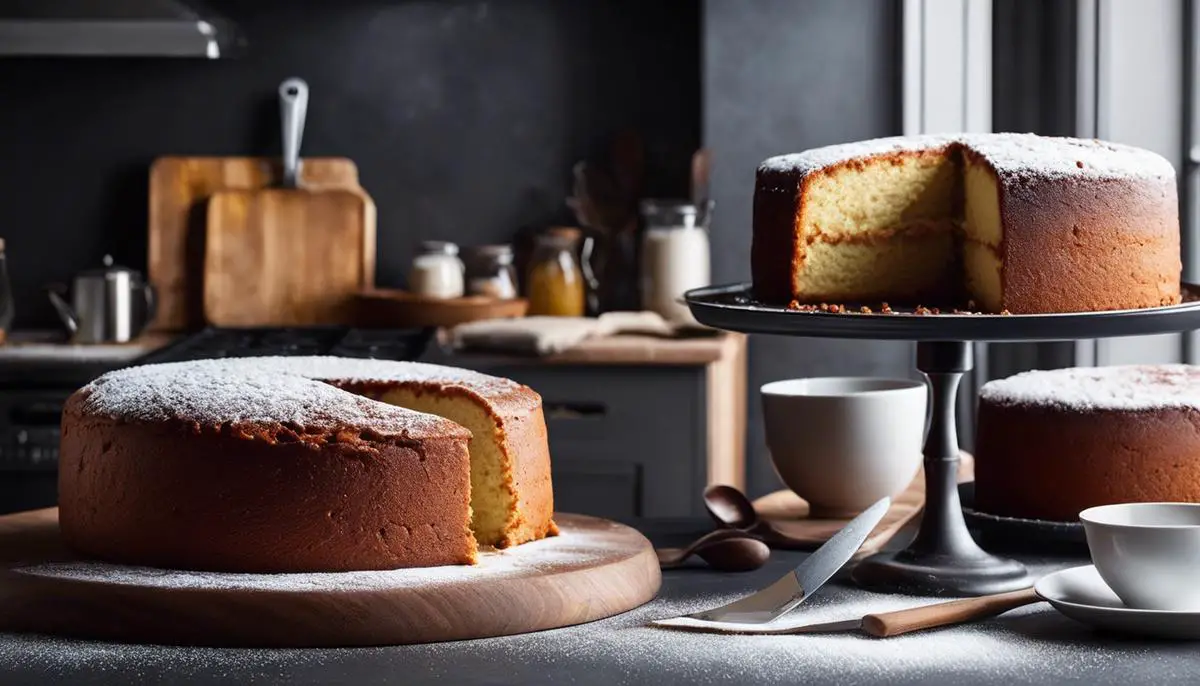
There’s something truly magical about the moment a perfectly moist cake popsicle touches your palate—it’s a symphonic combination of texture and flavor that sends a food lover’s heart aflutter. Indeed, creating a delectable cake popsicle base is an art form that, when mastered, becomes a joyful ritual in the kitchen. So, fellow culinary enthusiasts, let’s dive into the canvas of baking to discover how to ensure our cake popsicle bases are as tender and sumptuous as possible.
First things first, the choice of cake is fundamental. A classic sponge or butter cake serves as a splendid foundation, as they are known to hold moisture well. When whipping up your batter, substitute buttermilk in place of milk for a richer taste and a more tender crumb. The acidity in buttermilk acts as a tenderizer, giving your cake popsicles that coveted melt-in-your-mouth quality. Remember to enlist the help of room temperature ingredients. Eggs, butter, and buttermilk bond more readily when they’re warm, resulting in a smoother, airier batter.
Temperature control is your best ally. Preheat your oven for at least 15 to 20 minutes before your cake goes in. A consistent temperature ensures even baking, steering you clear from the dread of a dry, overbaked base. Employing an oven thermometer is a shrewd move; don’t always trust your oven’s internal gauge.
Another cornerstone is the bake until just done philosophy. Test with a toothpick! If it comes out with a few moist crumbs attached, it’s time to rescue your cake from the heat. Overbaked cake is the arch-nemesis of moisture, so keep a vigilant eye on your baking time.
After your cake has cooled, it’s time for crumble and mix. The texture should be fine—not too chunky—ensuring your popsicles are smooth. Now, here is where moisture makes its grand entrance. Fold in a dollop of frosting or cream cheese. This acts not just as a glue binding your cake crumbs together, but also as a guardian of moisture, ensuring that each bite is as lusciously soft as the first. Portion this blend with love, crafting bite-sized spheres of joy.
Patience, dear food connoisseurs, for chilling your newly formed balls is a must—cool them until they’re steadfast in their shape. This pause in creation locks in moisture and gives you a firm base to work with. Arm them with sticks, bathe them in tempered chocolate or candy melts – and you’ll witness how a crisp shell yields to the tender heart within.
There you have it, a lovingly curated guide to moist cake popsicles. It’s these small touches, from ingredient choices to temperature tweaks, that elevate your sweet creations to gastronomic artworks meant for sharing. Unleash your inner kitchen alchemist and let the symphony of moisture-filled bites begin.

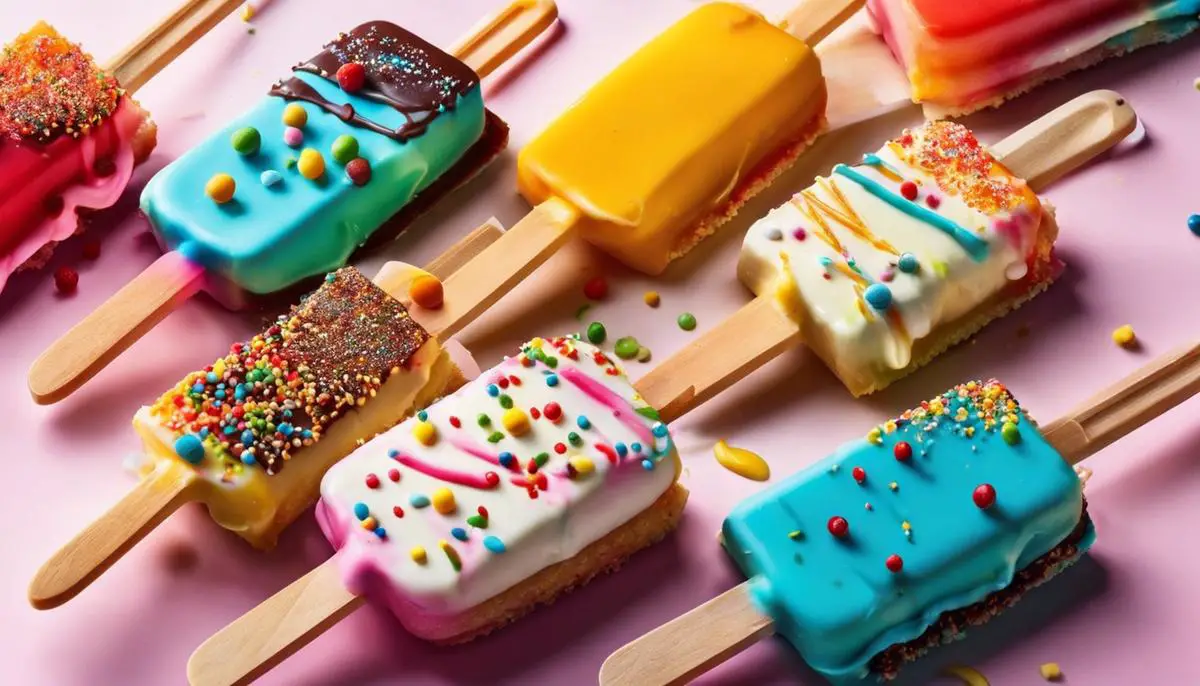
Crafting the Popsicle Shape
Ah, cake popsicles, those whimsical treats that blend the lusciousness of cake with the fun and convenience of popsicles. They’re a delightful twist on the classic cake pop and, with the right technique, can be molded to sheer perfection.
Let’s talk about the art of molding. To master these treats, you’ll need a high-quality popsicle mold. Silicone molds are the ultimate game-changer, providing flexibility and an easy release. Forget the frustration of trying to pry cake pops out of a rigid form; silicone molds are a dream, allowing your cake popsicles to be removed with ease, showcasing picture-perfect corners and smooth surfaces.
Next up: the packing process. The key here is to press lightly but firmly. You’re not trying to create a culinary diamond out of coal, so avoid over-packing. Even filling ensures even freezing, which is paramount for a uniform shape. Scoop the cake mixture into each cavity and gently pat it down with your fingers or the back of a spoon, checking for any potential air pockets that could disrupt the final product.
Remember, patience is a virtue in the kitchen. Once your molds are filled, it’s off to the freezer. This isn’t the time to rush. A full freeze sets everything in place and will make your coating process a breeze. We’re talking a minimum of a few hours, though overnight is even better for those who can resist the temptation.
Dipping in chocolate or candy melts? Dip quickly and let the excess drip off swiftly to avoid a lopsided cake popsicle. Keeping the melts at the right temperature is also crucial—a warm bath will retain the fluidity of the coating without overheating it.
Decorating your cake popsicles is arguably the best part. Unleash your creativity here! Whether you’re a minimalist who appreciates the beauty of a single sprinkle or you lean into the extravagant, with drizzles of contrasting chocolate and a myriad of toppings, make each cake popsicle your own edible work of art.
When it’s time to remove your masterpieces gently push from the bottom and coax them out of their molds. Don’t pull them by the stick, or you might end up with a handheld stick and a cake popsicle still sitting in the mold.
Ready to serve? Delight in the moment your popsicles make their grand entrance. Watch as eyes light up and taste buds dance to a symphony of a richly flavored, perfectly molded treat that whispers of casual afternoons yet speaks of decadence.
There you have it, friends—a starting point for those who seek perfection in their kitchen creations. Whether serving up these delightful cake popsicles at a soiree or enjoying them as a little luxury, know that the joy of each bite reflects the love and care poured into every step of their making. Bon appétit!
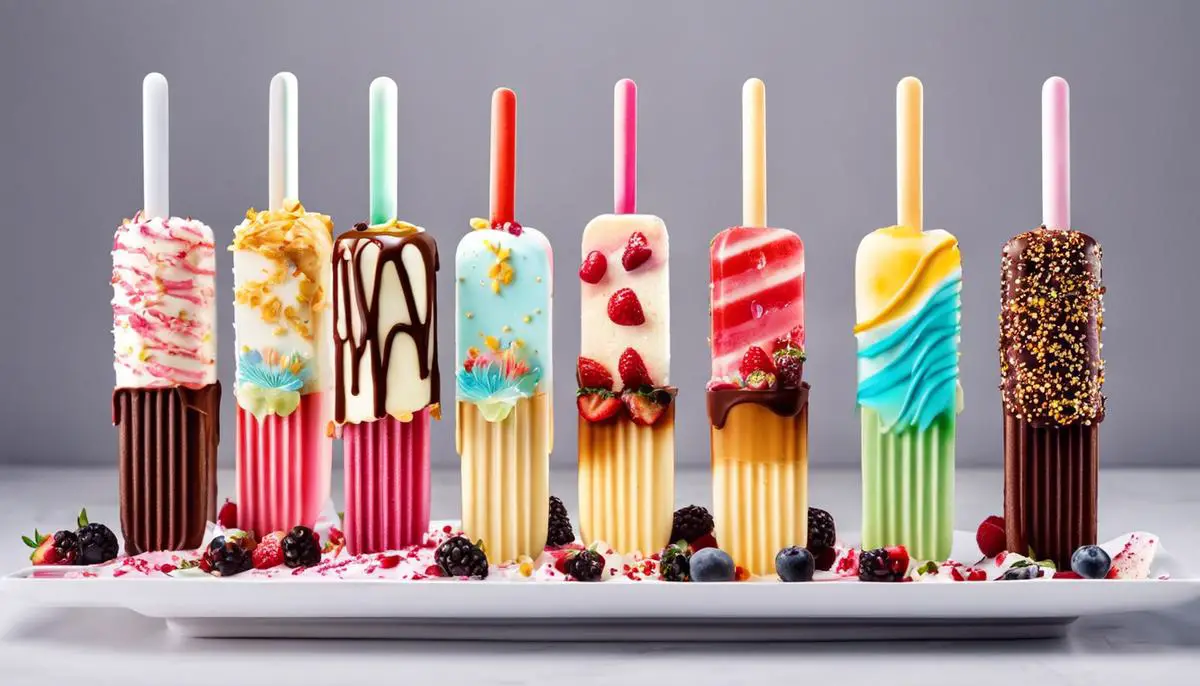
Decorating Techniques
Once you’ve mastered the basics of crafting the perfect cake popsicle base, it’s time to let your culinary creativity shine by elevating these treats from plain Jane to absolutely show-stopping. The secret to transforming these scrumptious bites lies in the art of decoration, detail, and a sprinkle of whimsy.
Start with a Stunning Drizzle – Melting additional chocolate or candy melts and pouring it over your coated cake popsicles creates a fine web of deliciousness that looks as incredible as it tastes. Choose a contrasting color for maximum visual pop, and let the chocolate drizzle set to a charming, crackled finish.
Get Fancy with Fondant – If the opportunity presents itself, flex those artistic muscles with fondant. Roll it thin, cut out delightful shapes, or even sculpt tiny figures to adorn your cake popsicles. A miniature rose, an animal face, or geometric patterns can easily turn your treats into edible works of art.
Adorn with Assorted Sprinkles – Sprinkles bring a fun, festive touch that’s guaranteed to charm eaters of all ages. Beyond traditional jimmies, consider luxe options like crushed gold leaf, silver dragees, or pearlized sugar balls to bring a touch of elegance to any event.
Texturize with Toppings – Think outside the sprinkle box and play with alternative toppings like crushed nuts, toasted coconut, mini chocolate chips, or even small pieces of toffee or brittle. The additional texture will not only wow your taste buds but also create a feast for the eyes.
Glam Up with Glitter – Edible glitter or luster dust can bring a magical spark to your cake popsicles. A light dusting can add a glamorous sheen fit for the finest of festivities.
Personalize with Piping – A piping bag and a tiny nozzle can help inscribe initials, pipe on tiny flowers, or create dainty designs. This gives personalized flair, perfect for parties, weddings, or special occasions where custom touches go a long way.
Infuse Thematic Elements – Align your decorations with a theme or season and get creative! Use colors and shapes to match holidays, sports teams, or even mimic the look of other favorite desserts, like miniature ice cream cones or fruit.
A Final Touch of Flair – Adding small accessories like tiny bows, edible beads, or patterned paper straws can provide the finishing touch that takes your cake popsicles from delightful to dazzling.
In sharing these treats, you’re not just offering a bite of cake on a stick; you’re providing an experience, a conversation starter, and a moment of joy. Unveiling your meticulously adorned cake popsicles is more than just revealing a dessert—it’s about presenting a labor of love, a testament to the joy found in culinary creation and the power of food to truly bring us all together, one delectable pop at a time.
With the magical world of cake popsicles at your fingertips, you’re now equipped to turn a simple baking endeavor into a spellbinding array of edible art. The endless possibilities of decorating with melted chocolates, colorful sprinkles, and indulgent drizzles allow you to express your creativity while crafting these delightful desserts. Let your newly acquired skills lead the way to a multitude of festive, fabulous, and flavorful adventures. Remember, each cake popsicle you create is not just a treat—it’s a reflection of your personal touch, a small piece of joy to be shared and savored with every delectable bite.